If you have information to share with the people of Burton, we want to hear from you.
This guide introduces the basics of publishing a blog post.
You are more than welcome to contact the Web Administrators to discuss whether an idea is relevant for burtonvillage.org, but it will be up to you to write the copy and provide images.
Do you need a Contributor account?
Yes – if you intend to produce regular copy (for instance, if you are setting up a society, club or regular events): contact WebAdmins for an account and training. The benefits of having your own account are that you can post blogs without delay.
No – if you have information of a one-off nature, such as a wildlife sighting: write your info in a Word document or email, include photos separately (images should be between 1200 x 800 pixels and 2000 x 1600 pixels, less than 2MB in size, in jpeg, jpg, png, gif or ico format), then contact the WebAdmins by email to post your blog. You will be credited as author in the blog. Allow some time for your blog to be published.
Getting started
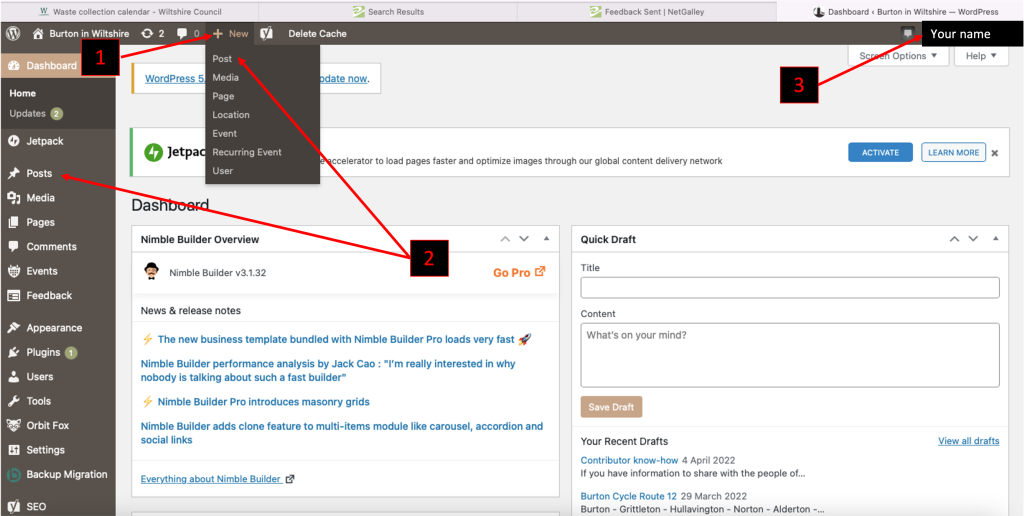
Once you’ve been set up with an account, and have logged in to the burtonvillage.org website, WordPress will open at your dashboard (Fig 1).
Writing a Blog Post
There are two ways to create a post in WordPress. By clicking on the + sign (1) on the Screen Options menu, a dropdown menu will appear. Select Post (2). Alternatively, select Post (2) on the Dashboard menu on left of your screen.
While we are on this screen, just a note to always logoff (3) when you have finished a session.
The Editor Screen
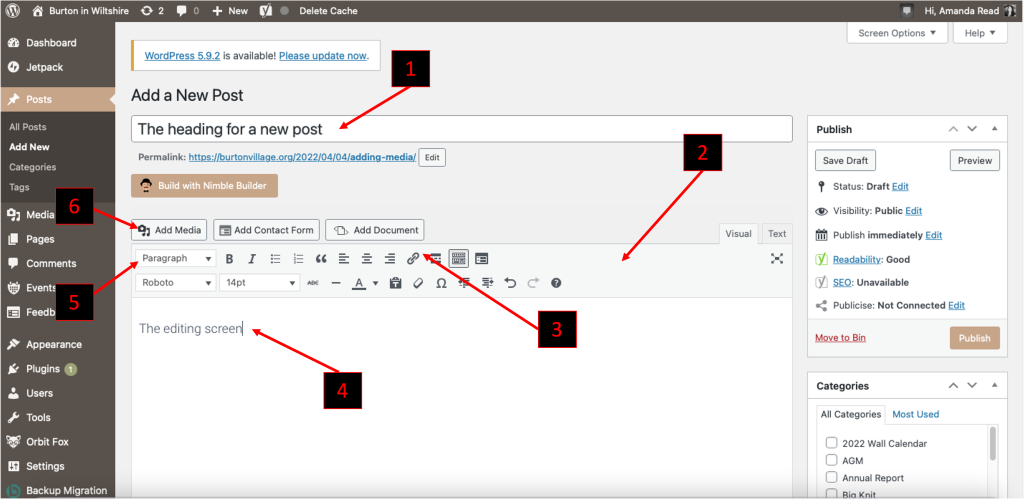
After selecting Post, the editor screen will open. This is where you write your blog.
WordPress has two versions of the editor screen: the Classic editor (Fig 2) was the original default WordPress editor. It is a simple text editor similar to Microsoft Word. This is burtonvillage.org‘s default editor, but you may opt to edit your posts in Block editor.
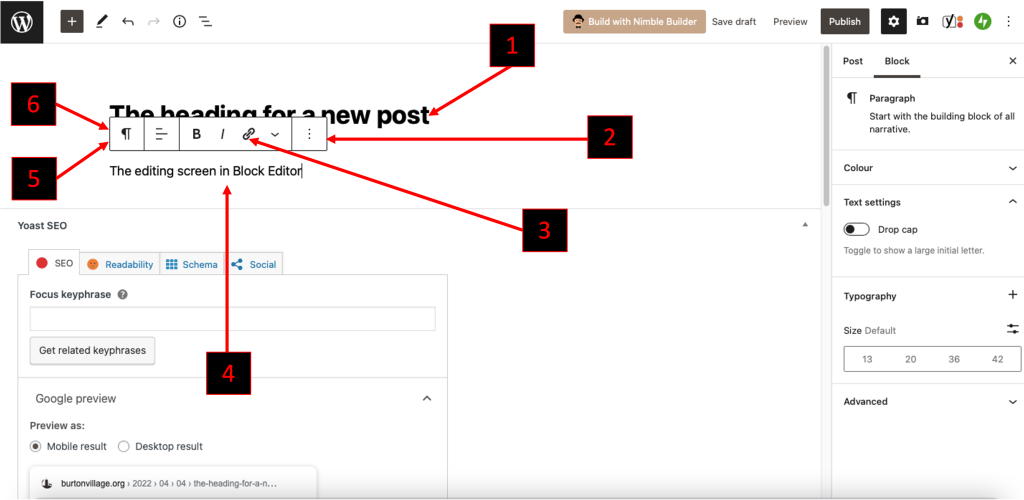
The Block editor (Fig 3) has a different interface from its counterpart. Blocks are content elements such as paragraphs, headings, images and lists. You can add, change and move blocks to get your blog looking just right. The document settings are in the right sidebar.
Familiarisation
Take a moment to familiarise yourself with the screen:
- Title, Heading, or <H1> tag. This is what visitors to your blog will see as the page title.
- Toolbar. Note, the toolbar is static on the classic editor, and floating on the block editor. Hovering your mouse over any icon on the the toolbar will reveal its function.
- Link. The link function works much the same as when adding links to emails or Word documents. Click on the word or phrase you want to use as a link. Select the Link icon in the toolbar. Add the url (best to copy and paste from source to avoid typos) in the box and hit Enter. It is good practice to include links in your blogs. Linking internally (ie. to another place on the same website) means visitors to your website stay longer. Linking externally makes you a good webizen (a citizen of the web, in other words a person adept in web techniques). A word of warning: regularly check your links to ensure they are not broken.
- Editing screen. This is where you write your blog. Remember to break up your text with sub-headings and visual elements, such as images. This will make it more attractive to readers, meaning they are more willing to spend time reading your blog.
- Classic editor: Style. Click on the arrow for a pulldown menu to change to different heading levels. Block editor: Block type. Change the block type for Headings, to insert pull quotes, images/other media, or many other different formats.
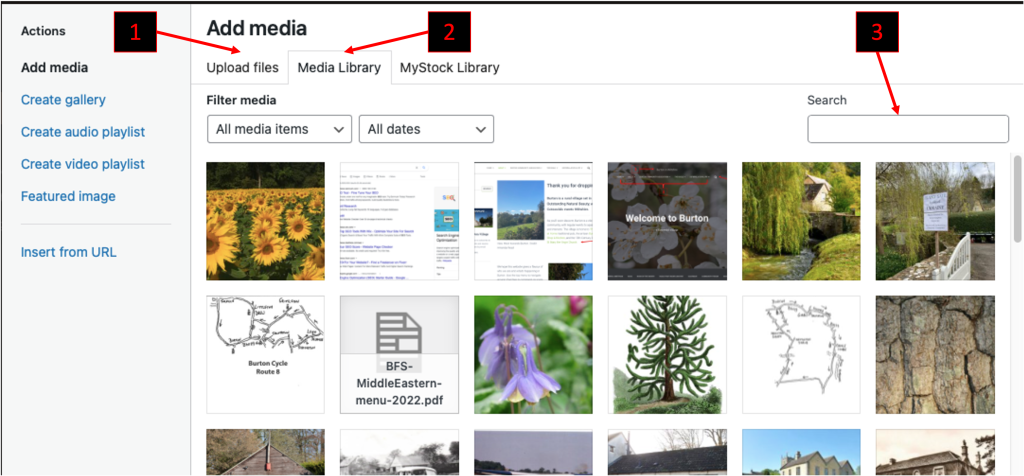
- Add media (note, in Block editor, you use the Block type function). To avoid copyright issues, we recommend you only use your own or existing burtonvillage.org photos and images. Images should be between 1200 x 800 pixels and 2000 x 1600 pixels (and less than 2MB in size). Click on Add media (Classic editor) or Image in the Block type (see Fig 4 below) and you will have the option to upload from your device (1), or from burvillage.orgs Media Library (2) (or to insert from a URL, but as stated above, we recommend you avoid using external images). We also recommend you give your image a title (eg. the BCA logo is, appropriately enough, called ‘BCA logo’), so you can find it easily (3) when you want to use it again.
Finishing off
Before you publish, add categories and a featured image, also check our Dos and Don’ts (in the sections below).
Next, Preview (button top right of screen) your blog to check layout. Then when you are happy with your blog, Publish.
Categories
A category is one of the default taxonomies in WordPress. Use categories to organise your blog posts. For instance, some of our Walking blogs are also listed under History, as they are walks with historical interest. To set a category, go to the the Category module on the right of your editor.
Featured image
A featured image represents the contents, mood, or theme of a post or page. When used for all blogs of a particular type, such as The Bugle editions, it creates branding. A featured image makes people more likely to click on your link, look at/read the content, and share it with others. To set a featured image, go to the the Featured Image module on the right of your editor.
Dos and Don’ts
- DON’T include personal details, such as your telephone number and email address, in a blog
- DO follow the SEO guidance – this will get your blog noticed
- DO use headings to break your blog into bite sized pieces for the reader
- DO use visual elements such as images or lists for impact
- DO add at least one category – to make your blog easy to find
- DO set a featured image – to make your blog more attractive (= more likely to be read) when seen in a list.


2 Comments
Dean Pendry · 04/09/2022 at 6:23 pm
Hi
Wondered if I could promote my local business on the business/enterprise page.
Here is a link below to our website , hopefully you can put a little something together
https://west51campers.co.uk/
Below is a link straight to our bookings page , customers just have to use the link WEST20 at the checkout .
https://west51campers.co.uk/bookings/
Really hope you can help and have a lovely weekend
Amanda Read · 04/09/2022 at 9:53 pm
Hi, Dean. Thank you for your comment. I’ve emailed you some ideas for taking this forward. Hope we can work together to promote your business. Best wishes. Amanda